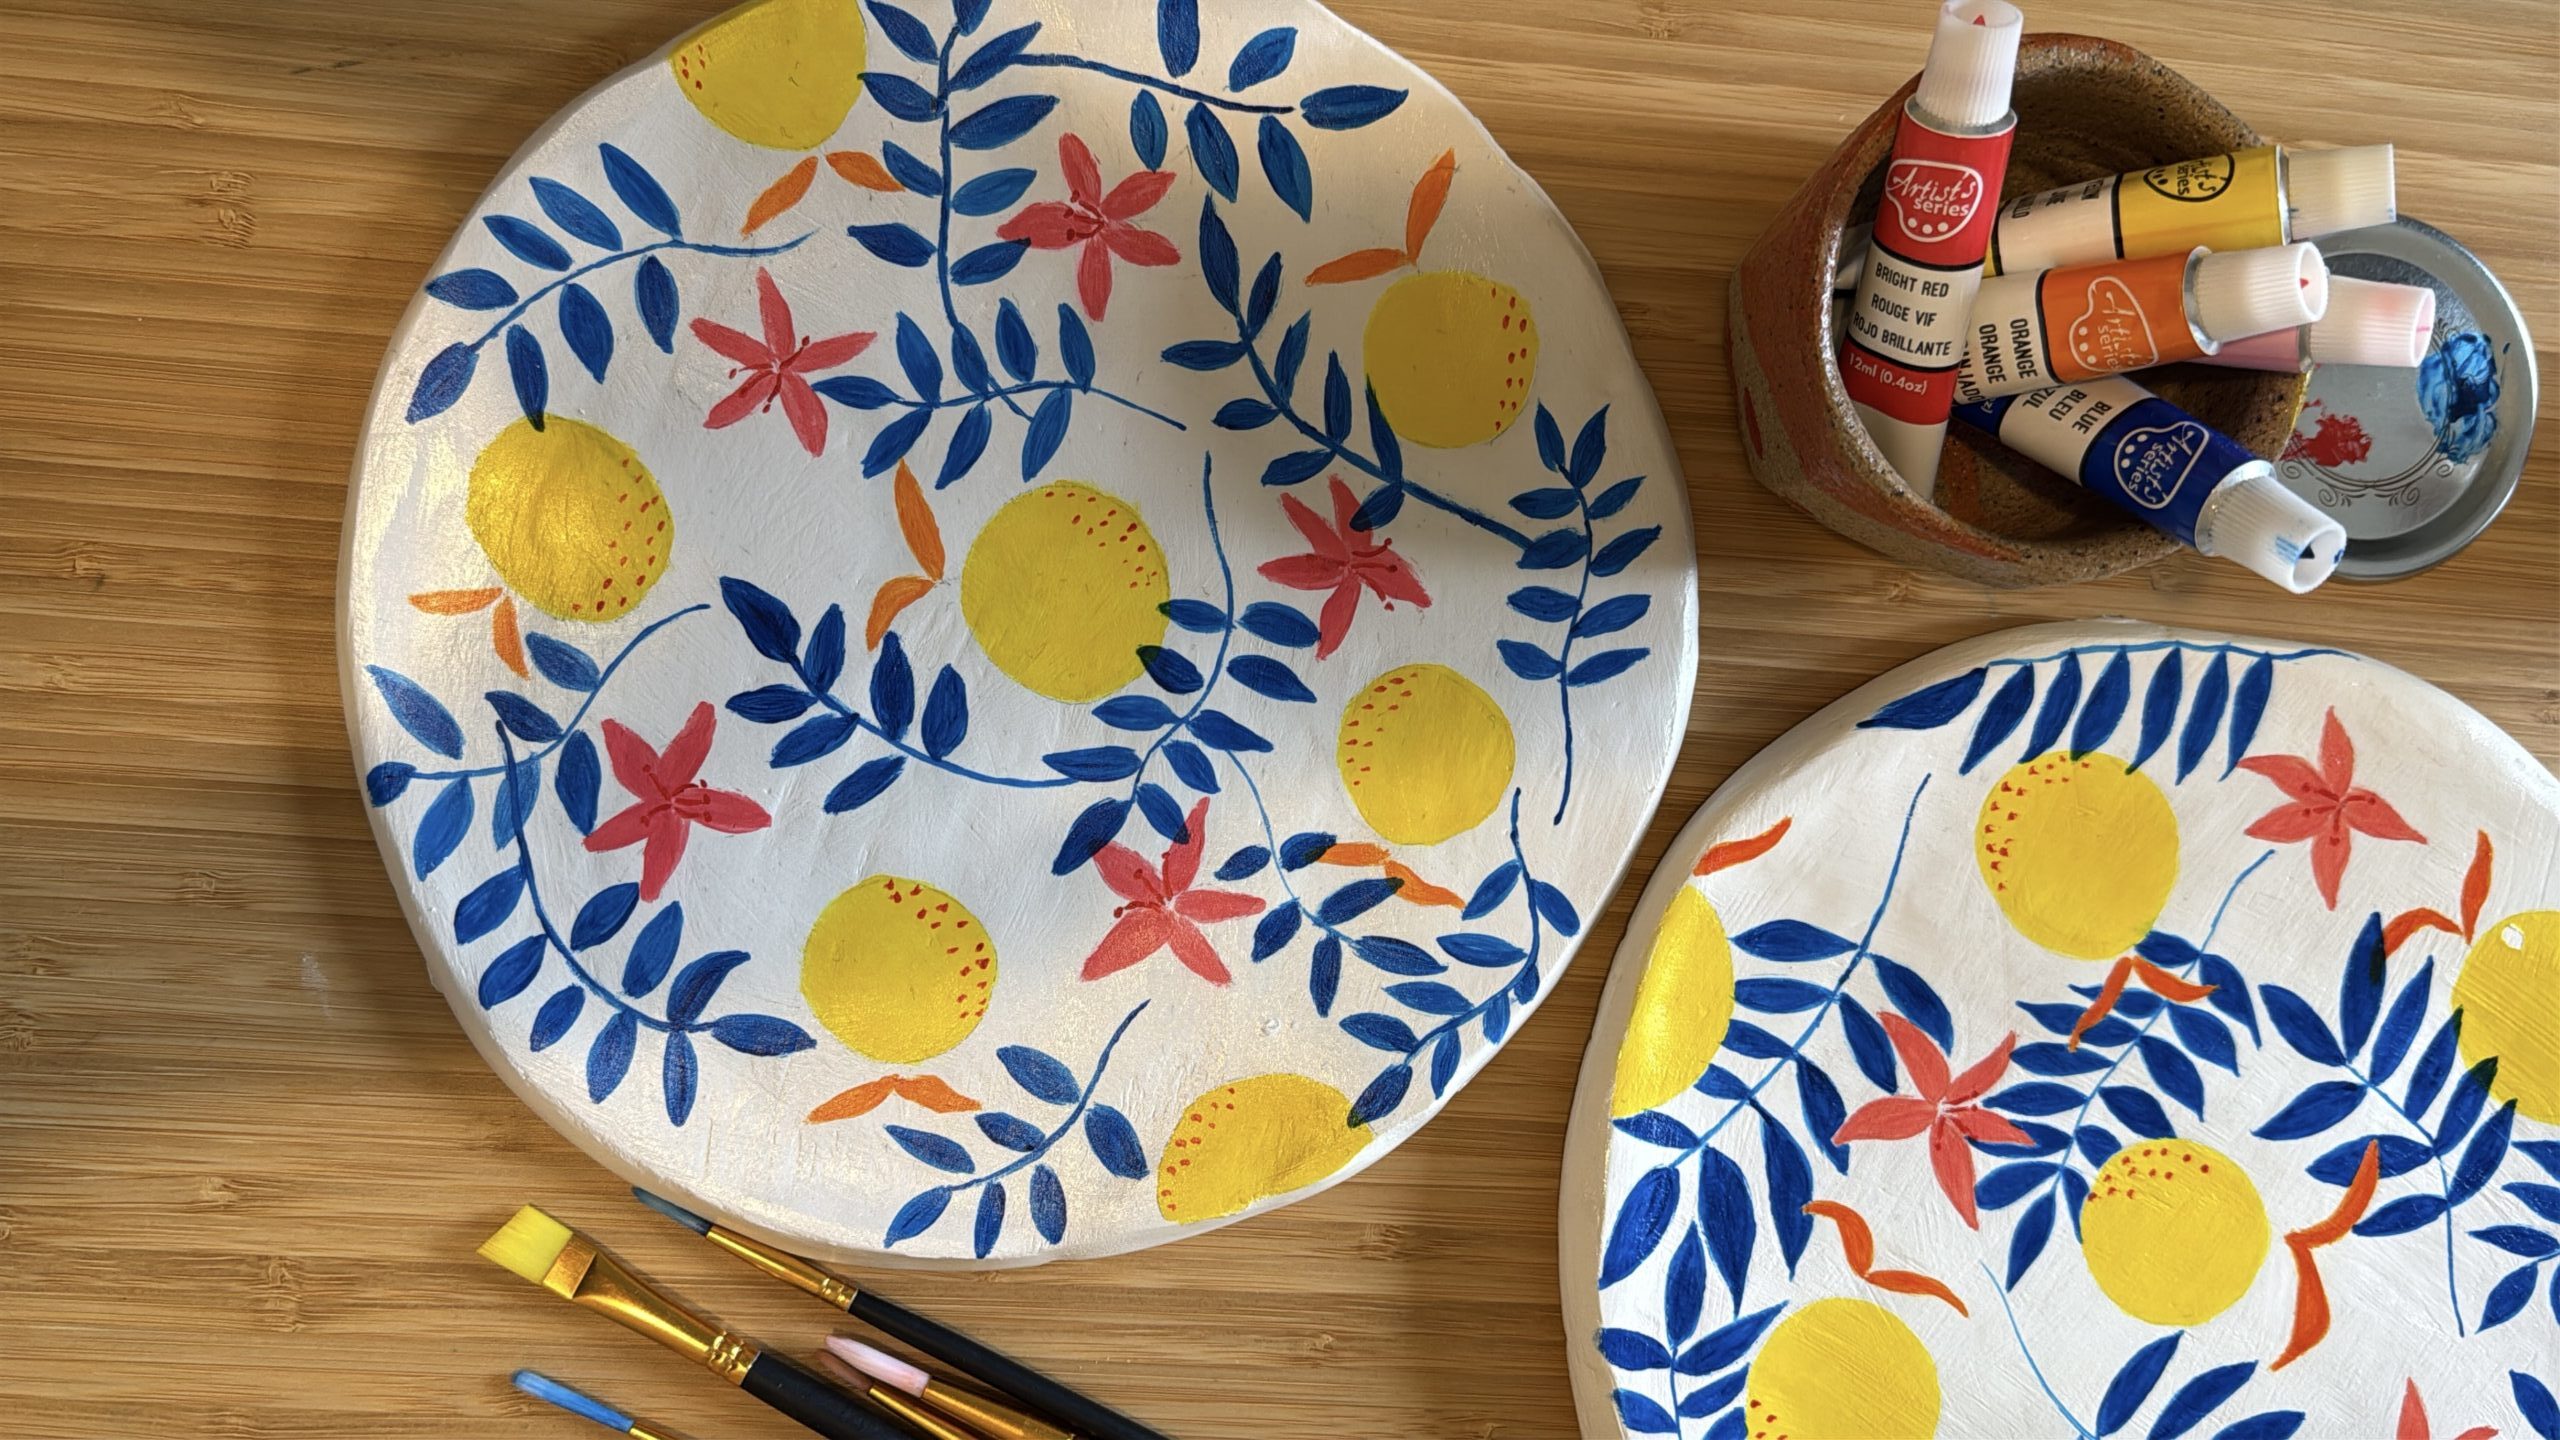
The first time I placed these charger plates on my spring table, I stood back and felt genuinely proud. Two handmade clay plates, painted with my own surface pattern: lemons, a flower, blue foliage, sitting at a table with a tablecloth I had built entirely by hand.
But these clay charger plates almost didn’t exist.
This is the full story of how I made them. The creative decisions, the process, the frustration, the resilience and everything I learned along the way.
If you’ve been wanting to make your own DIY clay charger plates at home, this tutorial will show you exactly how. And more importantly, it’ll show you that handmade doesn’t mean perfect. It means made with intention. 🌿
It Started as Something Else — The Plan B Story
These charger plates were never the plan.
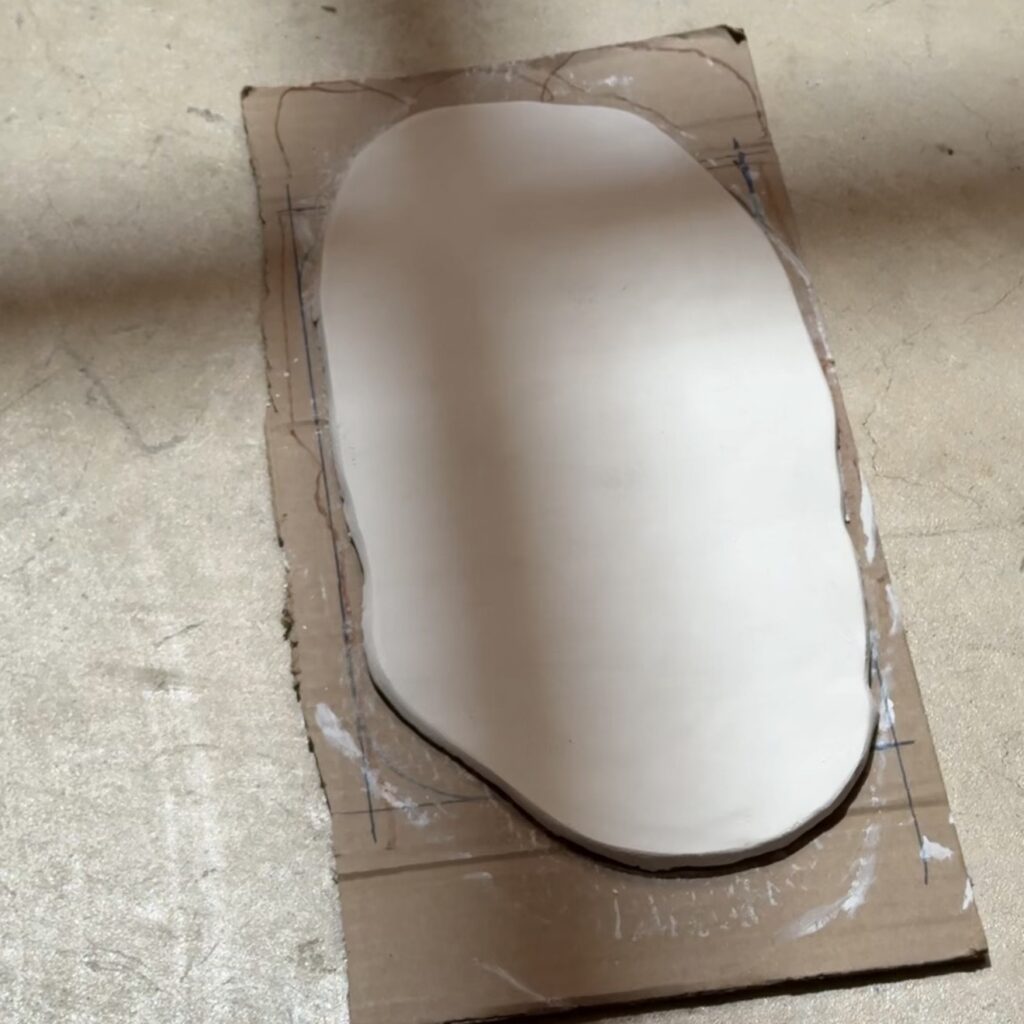
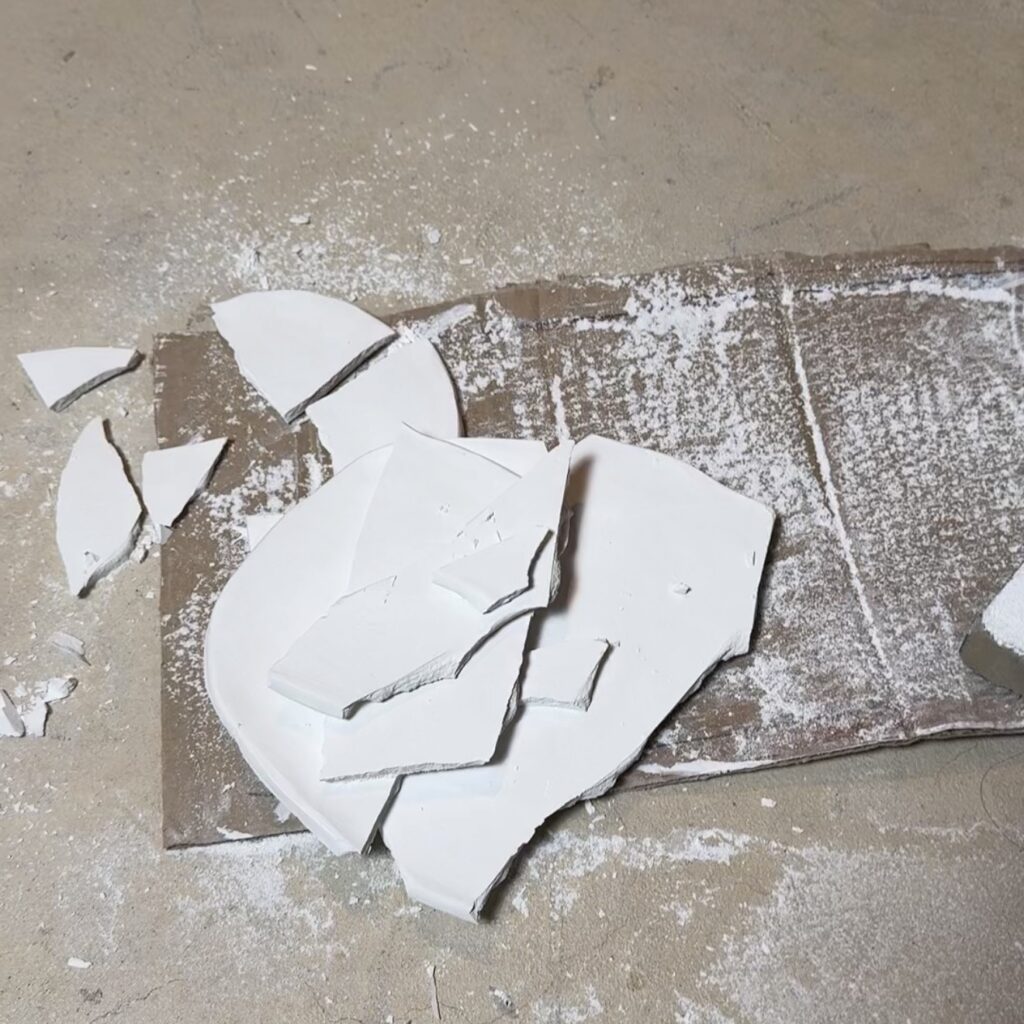
I was making a decorative tray as a handmade gift for a friend — something personal, with my own surface pattern on it. I’d designed the pattern, prepared the clay, and shaped the tray carefully. And then it broke…Completely… into many pieces…
I stood there for a moment. And then I thought, ‘Charger Plates.’
I had been wanting to make something handmade for my spring tablescape, something that would be the heart of the whole table. The pattern I had designed was colourful, fresh, joyful. Exactly what the table needed. So I pivoted completely and started over.
This is the thing about handmade work that nobody tells you clearly enough: the best pieces often come from the broken ones.
Plan B has a way of becoming the thing you’re most proud of.
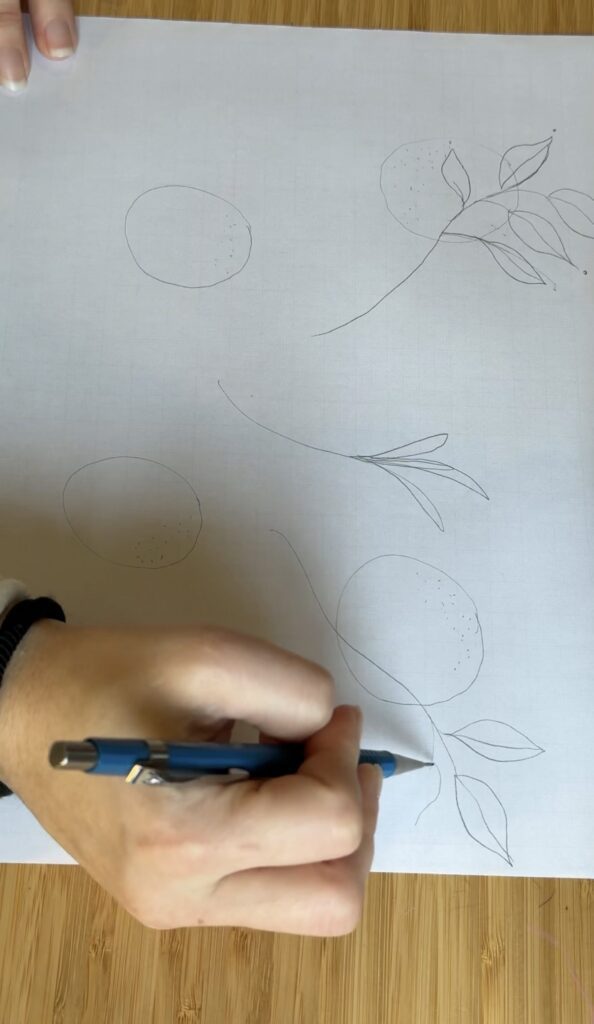
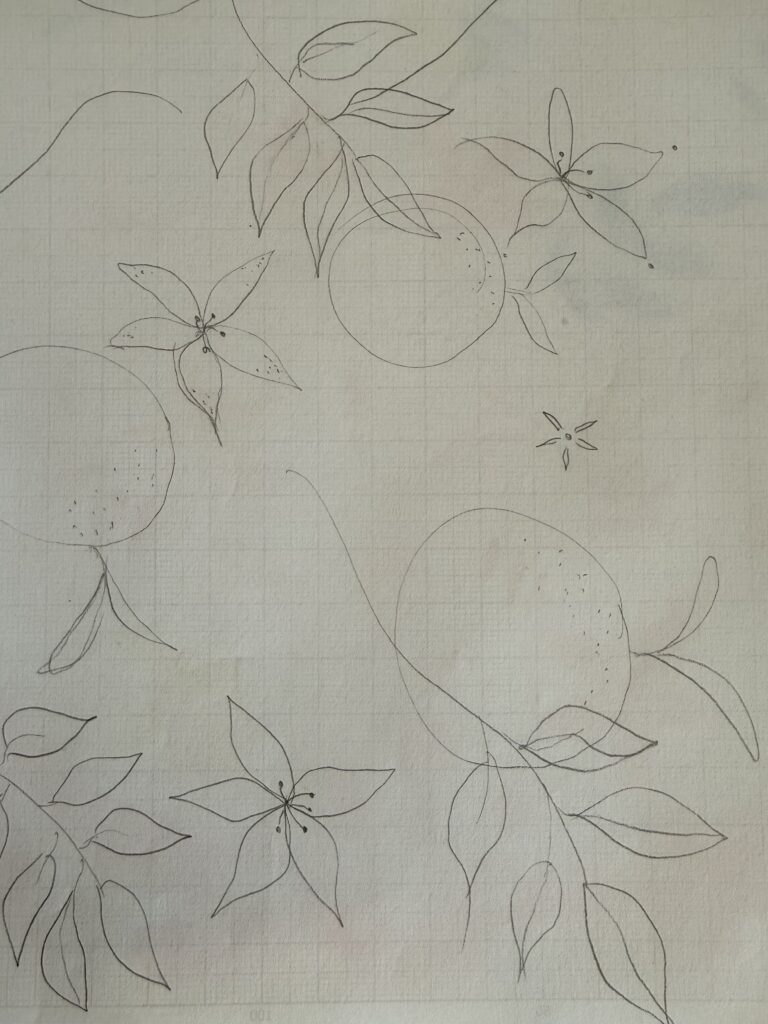
Designing the Pattern
Before I touched any clay, I spent time with the pattern.
The pattern I’d designed for the Tray (plan A) was everything I wanted: Colourful and fresh, carrying the same energy as the spring table I was planning.
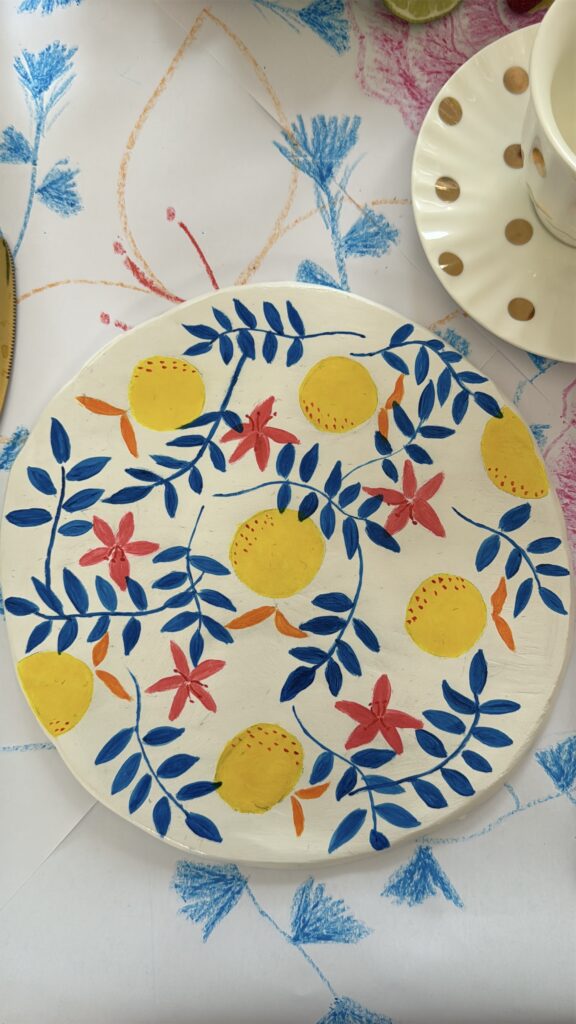
I chose three main motifs: Lemons, a flower, and layered foliage. Simple, but specific.
*All rights reserved
The design decisions that mattered most:
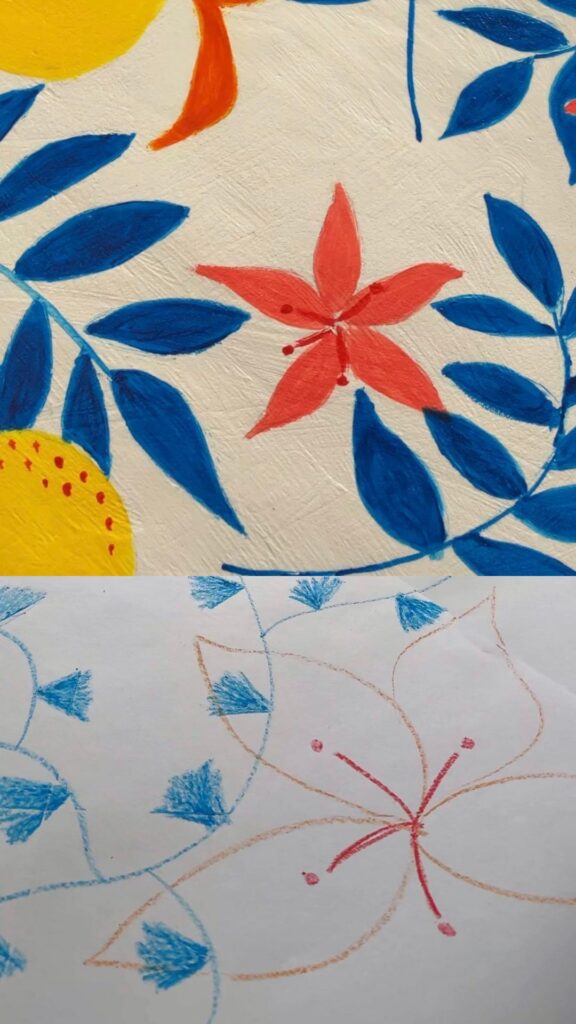
The flower shape I chose for the charger plate is the same orange flower I drew on my handmade paper roll tablecloth. This was completely intentional.
When you repeat a motif, even subtly, across two elements of a tablescape, the whole table starts to feel designed rather than assembled. Everything speaks to something else. The eye travels around the table and finds connections.
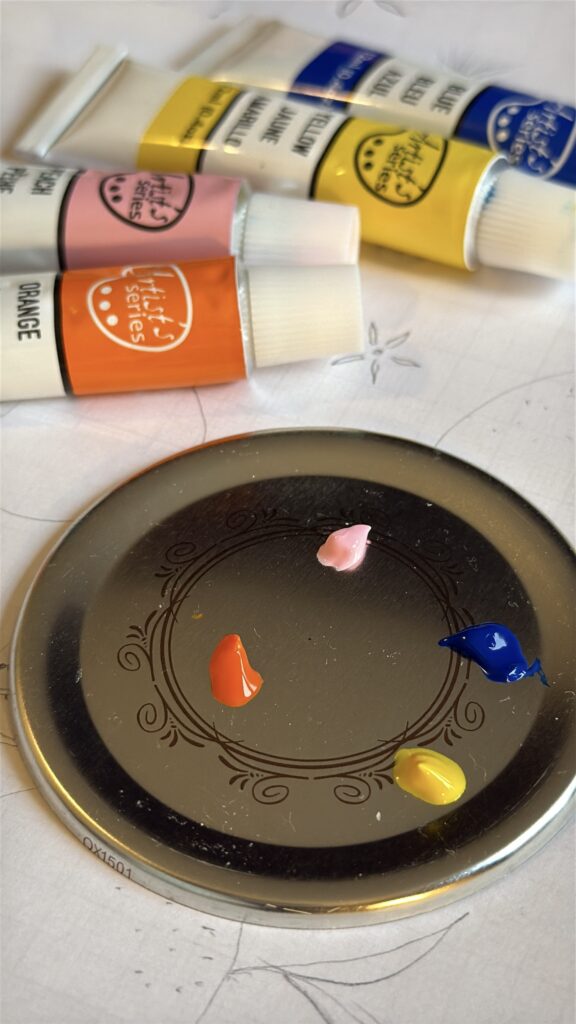
I chose the colours on purpose: yellow, orange, red, coral, and blue. They feel like a mix of spring and summer: Warm, bright, and alive. I picked these colours knowing they’d match the fruit I planned for the centrepiece: Oranges, lime, strawberries and lemons.

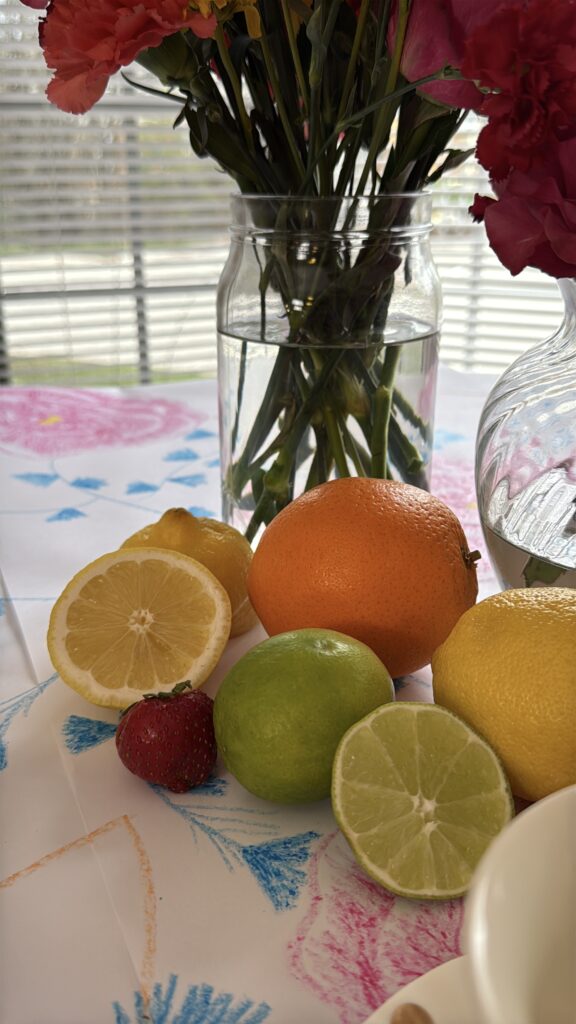
Colour is the thread that ties every element of a tablescape together.
When the charger plate pattern matches the fruit in the centerpiece, we feel that we like it, even if we can’t quite explain why the table feels so well put together.
* Spend time on your pattern before you spend time on your clay. The design decision is the most important one you’ll make. Everything else is just execution.
What You Need — Materials
The good news: you don’t need a pottery wheel, a kiln, or any specialist equipment. Everything I used is available on Amazon and is completely beginner-friendly.
Materials list:
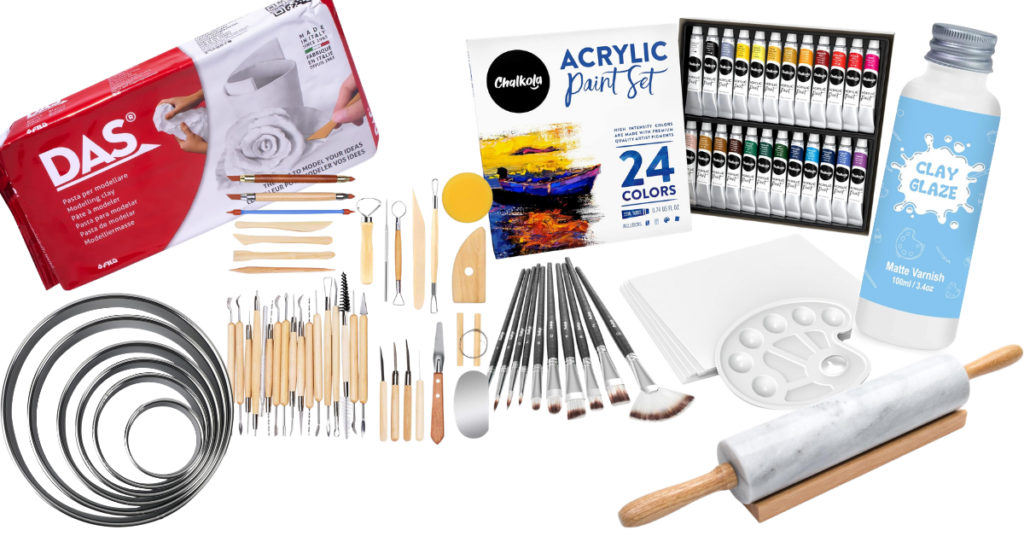
Air-dry clay — this is your primary material. Choose a white or off-white clay for the best paint results. I recommend a smooth, fine-grain clay that rolls evenly without cracking.
A rolling pin — a standard kitchen rolling pin works perfectly. Roll the clay to approximately 5–6mm thickness for a charger plate that feels substantial without being too heavy.
A circular template — I used a large dinner plate as my template to trace the shape. A large circular cutter works too. The goal is a consistent, clean circle.
Clay sculpting tools — for smoothing edges and creating a slightly raised rim. A basic set covers everything you need.
Acrylic paints — choose a set with a good range of colours. For my pattern, I needed yellow, orange, red, coral, and blue.
A fine detail brush set — the pattern work requires precision. A set with multiple fine tip sizes gives you control over both large motifs and small details.
Mod Podge or ceramic sealer — to seal the finished painted surface and protect the pattern. Matte finish is the most beautiful for this style.
Come find all of these linked together in my Amazon shop. I’ve curated exactly what I used, so you don’t have to search. See my list “Air-dry clay pottery kit”.
The Step-by-Step Process
Step 1 — Prepare and roll the clay
Start with a clean, smooth surface. Take a generous amount of clay and knead it gently for 2–3 minutes to warm it up and remove any air bubbles. Air bubbles are the enemy of crack-free drying. work them out now.
Roll the clay to an even 5–6mm thickness.
Important: Use two equal thickness guides on either side of your rolling pin if you have them (chopsticks work perfectly) to keep the depth consistent across the whole surface.
Step 2 — Cut and shape
Place your circular template on the rolled clay and trace around it with a clay tool or a sharp knife. Cut slowly and cleanly. Remove the excess clay from around the edges and set it aside. You can reuse it.
My charger plates were flat, no raised rim. But for a charger plate with a slightly raised rim, gently press the edges upward with your fingertips and smooth them with a damp finger. The rim doesn’t need to be perfect. Slight imperfections are what make handmade pieces beautiful.
Step 3 — Smooth and refine
Use a damp finger or a soft brush dipped in water to smooth the entire surface (top, bottom and edges). This step takes patience, but it’s worth it. A smooth surface means better paint adhesion and a more finished result.
Check for any cracks or thin spots at the edges. Press them gently closed with a damp fingertip. Edges are where cracks most often appear during drying. Give them extra attention now.
Step 4 — Dry 48 hours
Place your charger plate on a flat, level surface, slightly elevated on a wire rack if possible, so air can circulate underneath. This helps the drying be even on both sides and reduces warping.
Now wait. 48 hours minimum. Do not rush this step. I’d say 72 hours would be the safest.
I won’t pretend that the waiting is the hardest part. You check it every few hours. You look for cracks. You pray.
My first two cracked, one at the edge, one across the centre. The third survived.
If yours cracks, start again. This is not failure. This is handmade. 🌿
Step 5 — Sand and refine the edges
Once your charger plate is fully dry, and only once it is completely dry. It’s time to sand.
Use a fine-grit sandpaper (220 grit works beautifully for air-dry clay) and gently sand the edges and rim of the plate in small circular motions. Work around the entire edge, then lightly sand the front surface to even out any small bumps or fingerprint textures left from the shaping process.
Don’t press hard. The clay is fragile at this stage, even though it feels dry; Let the sandpaper do the work gently.
When you’re done, wipe the plate with a barely damp cloth to remove any clay dust before moving to painting.
A clean, smooth surface means your paint will go on evenly and your pattern will look its very best.
Important: Always use a mask for this step
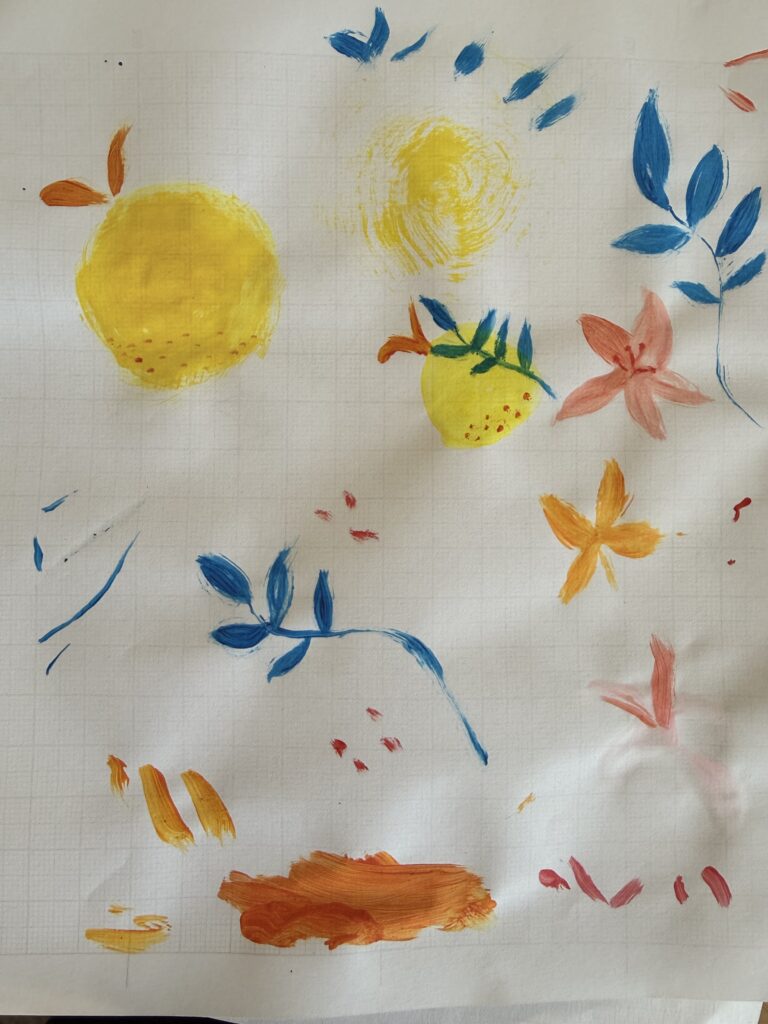
Step 6 — Paint your pattern
This is the best part. The moment the creative work begins.
Start with your largest motifs; In my case, the lemon shapes and the main flower. Use a medium brush and confident strokes.
Don’t overwork the paint. Air-dry clay absorbs paint quickly, and overworking creates a muddy surface. Let each colour dry before adding the next.
Build the pattern in layers: background motifs first, then mid-ground details, then fine line work last. Step back regularly and look at the whole piece, not just the section you’re working on.
For my pattern, those are the steps:
- I painted the lemons first
- the flower
- the blue foliage
- The lemon and flower’s detail in red.
The whole painting process took approximately one full day, broken into sessions with drying time between layers.
Step 7 — Seal
Once your paint is completely dry (at least 24 hours after the final layer), apply two thin coats of your chosen sealer. Use a wide flat brush and apply in long, even strokes. Let the first coat dry completely before applying the second.
The sealer protects your pattern, adds a beautiful finish, and gives the plate a more professional look.
*Matte finish is the most elegant for this style. it keeps the handmade quality without making the surface look plasticky.
Important note: These charger plates are decorative. They are not food safe and not dishwasher safe. Use them as the base layer under your dinner plate, exactly as a charger plate is meant to be used. They are for the beauty of the table, not the function of eating. 🌿
The Moment They Went to the Table
I placed them on the spring tablescape and stepped back.
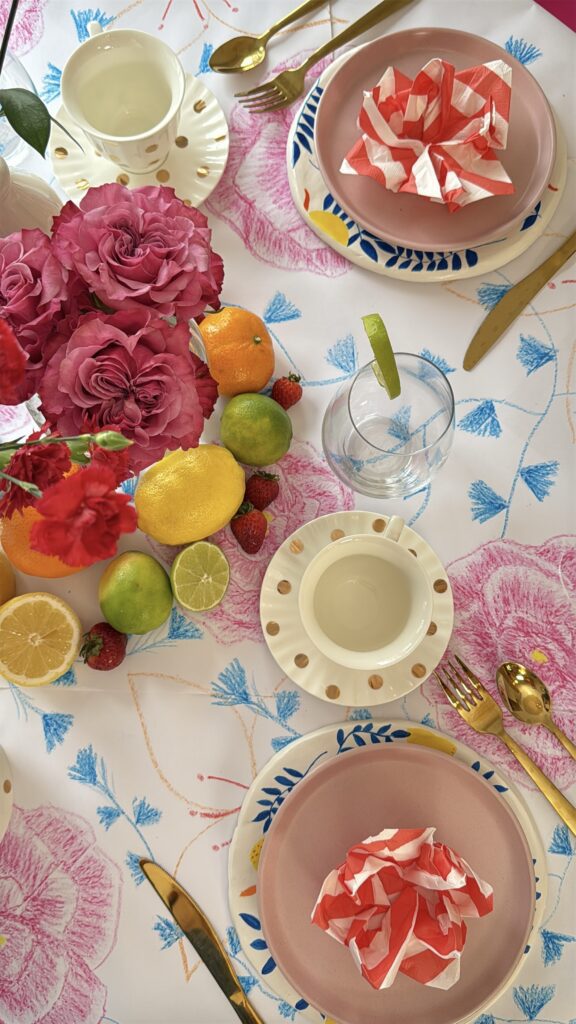
The lemon pattern sat next to real lemons and oranges in the centrepiece. The coral flower and blue foliage on the charger plate echoed the orange flower and blue foliage on the handmade tablecloth.
Everything I had planned in my sketchbook: The colour connections, the motif repetitions, the layering, was there. On a real table. Made by my hands.
I felt so proud.
Not because they were perfect. They weren’t. There are slight imperfections and small variations in the pattern from one plate to the other. But that’s exactly what makes them mine. That’s exactly what makes them mean something on this table.
💌Join the Mindful Letter
If you’d like to receive my “mindful letter” with monthly cozy favourites, behind-the-scenes, and drops of inspiration and beauty.
A Note on Patience — What Handmade Really Means
Two of my charger plates cracked. I rebuilt them from scratch — twice. I want to tell you this not to discourage you, but because I think it’s important.
When you make something by hand, you are in a conversation with the material. Sometimes the material says no. Sometimes it says not yet. Sometimes it says try again.
Handmade doesn’t mean perfect. It means you chose to make something with your own hands when you could have bought it. It means the imperfection is yours. The slight variation in the pattern is yours. The pride you feel when you place it on your table…completely, entirely yours.
And nobody else in the world has a charger plate with your pattern on it.
That’s what handmade means to me. Made with intention. Made with love. Not perfect. But completely, irreplaceably mine.
I’d love to know. Are you going to try making your own? Tell me in the comments.
Or if you have questions about any step of the process, ask me there, and I’ll answer every one.
With love, Carol 🌿
Proudly powered by WordPress

Leave a Reply